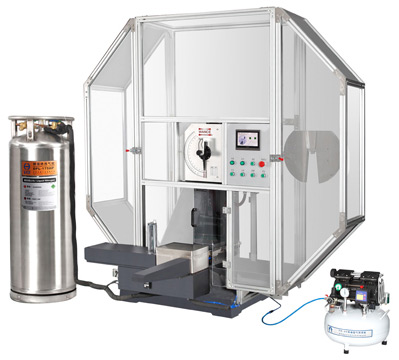
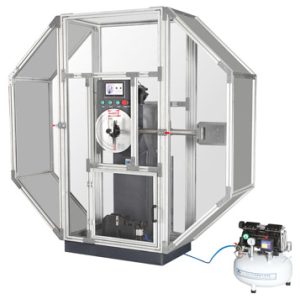
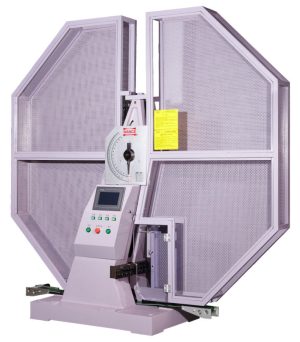
| Category: | Pendulum impact testing machine |
|---|---|
| Brand: | WANCE |
| Country: | China |
Application:
- Impact on metals, Charpy, both non-instrumented and instrumented
- Servo motor driven pendulum can stop at any position, realizing different angle/energy impact test for R&D use
- Equipped with cooling system, I can perform low temperature test down to -180℃
Standards
ASTM E23, ASTM E1820, ASTM E2298,
ISO 148, EN10045, ISO 148, EN10045, ISO 14556, JIS Z 2242, GOST 9454-78
Significance of instrumentation impact test system
Compared with traditional pendulum impact testing machine, instrumented type is more useful for accurate analysis of material property during crack, facilitating the engineers to understand the most fragile part of materials when developing new materials.
In addition to providing an measure of total absorbed energy (Wt), instrumented testing enables the determination of characteristic force, energy, and displacement parameters, such as the pre-maximum force energy (Wm); the post maximum force energy; the general yield force (Fgy); the force at brittle fracture initiation (Fbf); the arrest force (Fa).
Wance is the leading R&D and manufacturing of instrumented impact testing system in China, and has experienced experts for force transducer design. Combined with our high speed data sampling system, Wance provides the full complement of solutions for laboratory, ranging from 0.1J for engineering plastic to 100,000J for steel DWTT test.
Machine structure
The basic model consists of a heavy steel base on which the specimen holder (anvil) and a heavy-duty cast steel upright are mounted.
Framework
The framework is processed with one body casting. Front and rear columns are symmetric with single beam support axis, with high stiffness and precision.
The framework is made from ductile cast iron with high strength and stiffness, and with good capability of vibration absorbing.
The seat mass is 822kg, 15 times than 750J pendulum mass (54.65), fully complying with standards that seat mass must be 12 times than pendulum mass.
Pendulum
Pendulum is designed with 3D CAD software, greatly ensuring the striking center accuracy and pendulum moment precision. High strength pendulum rod highly reduces vibration after impact.
Striking head is combined design. 300J plus two counter weights becomes 450J, and 600J plus two counter weights becomes 750J. It is convenient to perform different energy tests with frequent changing pendulums.
Striking knife is tightened by wedge block, simple to change. Striking knife is available with R2 and R8, fully complying with ASTM, JIS, DIN, GB, ISO, EN and other standards.
Striking knife is made of anti-wearing high speed tool steel with hardening treatment, and hardness is larger than HRC60, with high strength, ductility and abrasion resistance.
Supports and anvils
Anvil shape is rhombus and can be used in any direction, meaning the using life is 4 times than traditional anvil.
The anvil material is high speed tooling steel CW6Mo5Cr4V2 after hardening treatment, and the hardness is larger than HRC60, with high strength, ductility and abrasion resistance.
It is very simple to change anvils with inner hexagon spanner. The anvil is machined by special process with high precision and good interchangeability.
Anvil is exchangeable and can be used four times by changing mount directions, greatly improving the servicing life and saving cost.
Energy display system
Three types of energy display are available:
- Analogue display: simple and direct to read impact energy
- Wide view touch screen
- Computer with test software
Instrumented impact system – IIS105
Instrumented impact system consists of striking knife with force transducer, data sampling card, signal conditioner and professional test software. Instantaneous force signal from transducer assembled on the striker is transferred to and enlarged by high speed signal conditioner. Enlarged signal is A/D converted by high speed data sampling card, then transferred to computer for storage and analysis. After calculating and analyzing original force vs. displacement curve, more characteristic parameters could be determined, furthermore specimen deformation and fracture property could be precisely judged.
Instrument data analysis system – Software
- Automatic curve fitting of force vs. displacements
- Automatically determine Fgy, Fm, Fiu, Fa, and other characteristic parameter, further determine after calculation Sgy, Sm, Siu, Sa, St, Wm, Wiu, Wa, Wt and others.
- Fully automatic data processing permits to get test results and report after each test immediately.
- Curve and raw data can be exported
Specimen collection system
- Motorized device is used for collecting broken specimens after impact, instead of manual cleaning, which fully prevents striker from getting stuck
- Unique specimen filtering function: automatically judge and transport qualified and unqualified specimens to different collecting box
Safety system
This series of machine has fully closed protection shield to protect operator against specimen splitting during test, and to deny any access to the inside during test. Built-in door interlock further ensures operator safety. The protection shield is constructed with aluminum alloy profile for frame and fiber glass for easy observation. Split-type door design is simple to repair and change pendulum.
Remark:
- 450J pendulum is assembled by 300J pendulum with two counter weight.
- 750J pendulum is assembled by 600J pendulum with two counter weight


